
 Shawn Peterson·Mar 7, 2026 2:20:38 PM

How to Create and Edit Sequences in HubSpot
A comprehensive guide based on official HubSpot documentation for Sales and Service Hub users.
HubSpot Sequences are one of the most powerful tools available for sales and service professionals looking to automate their outreach without losing the personal touch. Unlike bulk marketing emails, sequences allow you to send a series of targeted, timed email templates directly from your personal inbox to nurture individual contacts over time. By combining automated emails with manual task reminders, you can ensure that no prospect falls through the cracks. In this guide, we will walk through every step of building a high-performing sequence, from initial configuration to advanced automation triggers.
✅ Key Takeaways
- Requires an assigned Sales or Service Hub Professional/Enterprise seat.
- Contacts are automatically unenrolled when they reply or book a meeting.
- Sequences must be sent from a connected personal email, not a team alias.
- Automated tasks are assigned to the user who performed the enrollment.
Prerequisites for Getting Started
Before you can begin building your first sequence, you need to ensure your HubSpot account and user profile meet specific technical requirements. Without these, the Sequences tool will remain locked or inaccessible.
- Permission Levels: You must have "Sequences" permissions enabled within your user settings.
- Seat Type: An active Sales Hub Professional/Enterprise or Service Hub Professional/Enterprise seat is mandatory.
- Inbox Connection: You must have a personal email address (IMAP, Gmail, or Office 365) connected. Note: Team emails in the Conversations Inbox cannot be used for sequences.
Access the Sequences Dashboard
To begin, navigate to the main navigation bar in your HubSpot portal. Go to Automations and select Sequences. This dashboard serves as your mission control, where you can view existing sequences, monitor performance metrics like open and click rates, and track how many sequences you have remaining within your account limits.
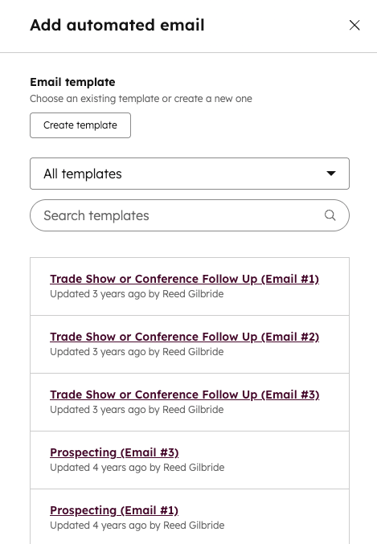
Choose a Template or Start from Scratch
Click the Create Sequence button in the top right. HubSpot offers a variety of pre-built templates for common scenarios like "Recent Conversion" follow-ups or "Cold Outreach." However, for maximum control or if you have specific brand guidelines, selecting Start from scratch is often the best path.
💡 Pro Tip: Before building your sequence, create your email templates in the Templates tool first. This allows you to use personalization tokens (like Fellow Business Executives) which will populate automatically during enrollment.
Adding Steps and Automation Logic
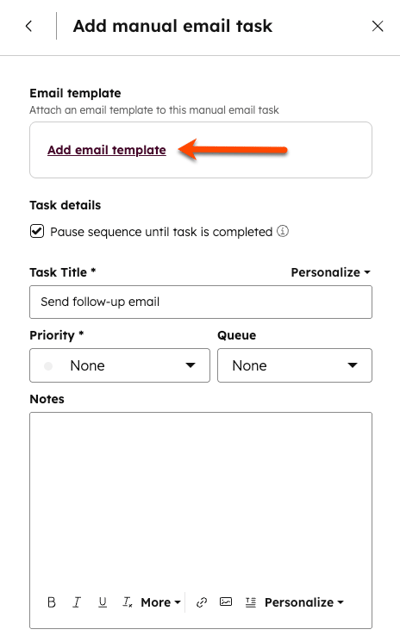
Now comes the core of the sequence building process. Click the + icon to add a step. You can choose from three main types of actions:
- Automated Email: Sends a pre-written template at a specific time.
- Task: Creates a reminder for you to call the contact, send a LinkedIn message, or perform research.
- Manual Email: Creates a task for you to draft a custom email based on a template.
Configure Unenrollment and Settings
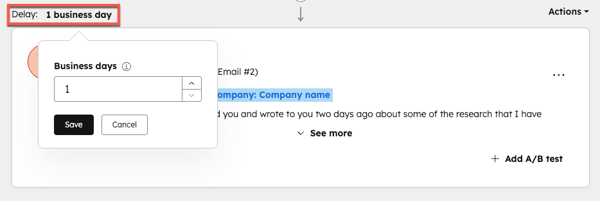
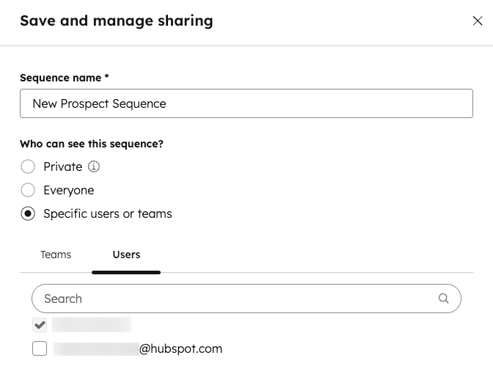
One of the most critical aspects of HubSpot sequences is the Settings tab. By default, HubSpot will unenroll a contact if they reply to any email or book a meeting through your integrated calendar. You can also customize "Follow-up" settings, such as defining which days of the week emails should be sent (e.g., Weekdays only) to ensure your message hits the inbox at the right time. Don't forget to name your sequence clearly before clicking Save.
Managing and Editing Your Sequences
Once a sequence is live, you can edit it at any time. However, there is a key distinction to understand: edits made to an active sequence will not automatically apply to contacts who are already enrolled. For those contacts, you must manually update their enrollment or unenroll and re-enroll them to apply the new steps.
To edit, simply find the sequence in your dashboard, click Edit, and you can add new steps, change delays, or swap out email templates. This iterative process is vital for optimizing your sales funnel based on what the data tells you about user engagement.
❓ Frequently Asked Questions
Why am I unable to use a team email address for sequences?
Sequences are designed to be high-touch and personal. They utilize the sender's own inbox reputation. Team aliases (like sales@company.com) are managed in the conversations inbox and lack the technical hooks required for individual tracking and sequence automation.
What happens if a contact replies to a sequence?
By default, the contact is immediately unenrolled. This prevents the awkward situation where a prospect says "Let's talk" and then receives an automated "Just checking in" email the following day.
Can I automate sequence enrollment with Workflows?
Yes. With Sales or Service Hub Enterprise, you can use Workflows to automatically enroll contacts in sequences based on triggers like form submissions or lifecycle stage changes.